A Magical DIY Wall Christmas Tree with Lights: A Step-by-Step Guide
A Magical DIY Wall Christmas Tree with Lights: A Step-by-Step Guide
Introduction
With enthusiasm, let’s navigate through the intriguing topic related to A Magical DIY Wall Christmas Tree with Lights: A Step-by-Step Guide. Let’s weave interesting information and offer fresh perspectives to the readers.
Table of Content
A Magical DIY Wall Christmas Tree with Lights: A Step-by-Step Guide

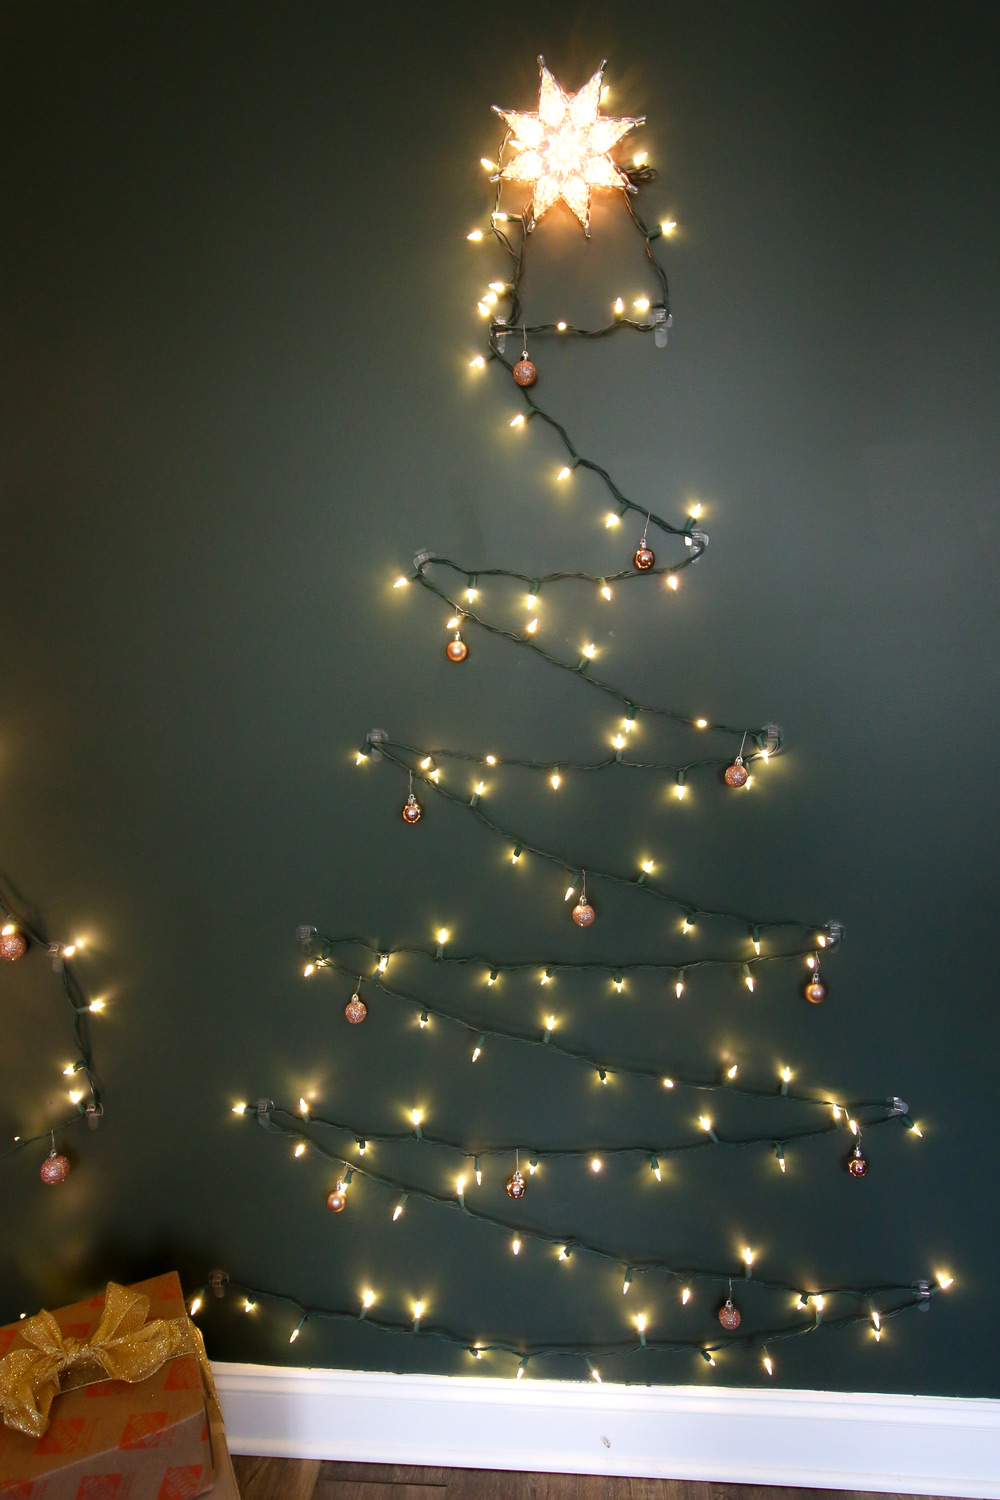
As the holiday season approaches, many of us are eager to deck the halls and create a festive atmosphere in our homes. One of the most iconic symbols of Christmas is the Christmas tree, but not everyone has the space or inclination to set up a traditional tree. That’s where a DIY wall Christmas tree with lights comes in – a creative and space-saving solution that adds a touch of magic to any room.
In this article, we’ll take you through a step-by-step guide on how to create your very own DIY wall Christmas tree with lights. From the materials needed to the final assembly, we’ll cover everything you need to know to create a stunning and unique holiday display.
Materials Needed:
Before we dive into the instructions, make sure you have the following materials on hand:
- Plywood or MDF board: For the backing of the tree, you’ll need a piece of plywood or MDF board. You can choose the size and shape you prefer, but a rectangular board measuring 4×6 feet is a good starting point.
- White paint: Give your tree a clean and crisp look with a coat of white paint.
- Green paint: For the tree’s foliage, you’ll need a vibrant green paint. You can choose a lighter or darker shade, depending on your preference.
- LED lights: These will be the crowning glory of your tree. Choose a set of LED lights in the color and length you prefer. Warm white lights will give your tree a traditional look, while multi-color lights will add a fun and playful touch.
- Power drill: For screwing the lights into the board, you’ll need a power drill.
- Screws: Choose screws that are thin and sturdy, making it easy to screw the lights into the board.
- Decorative items: Add some personality to your tree with decorative items like ornaments, tinsel, or garlands.
- A level: To ensure your tree is perfectly level, you’ll need a level.
- A measuring tape: Measure your board and lights to ensure accurate placement.
- A pencil: Mark the spots where you’ll be screwing in the lights.
Step 1: Prepare the Board
The first step is to prepare the plywood or MDF board. If your board is uneven or has any imperfections, use a sanding block to smooth it out. Then, apply a coat of white paint to the entire board, making sure to cover it evenly. This will give your tree a clean and crisp look.
Step 2: Create the Tree Shape
Once the paint is dry, use a pencil to mark out the shape of the tree. You can freehand the shape or use a stencil to create a more uniform design. Draw a large triangle for the base of the tree, with smaller triangles branching out from the center. You can also add some decorative swirls or patterns to make the tree more interesting.
Step 3: Paint the Tree
Using a small roller or brush, paint the tree shape with green paint. Start with the edges of the tree, working your way inwards in small sections. Make sure to leave a small border around the edges of the board to create a frame for the tree.
Step 4: Screw in the Lights
This is the most exciting part – adding the lights! Begin by measuring the length of your lights and marking the spots where you’ll be screwing them into the board. Use a pencil to make small dots along the edge of the tree, spaced about 2-3 inches apart.
Using a power drill and screws, screw the lights into the board, making sure they’re secure and level. Work your way around the tree, adjusting the spacing as needed to achieve a uniform look. Make sure to screw the lights into the board at a slight angle to prevent them from hanging down too far.
Step 5: Add Decorations
Now it’s time to get creative! Choose your favorite decorative items, such as ornaments, tinsel, or garlands, and attach them to the tree using glue, string, or screws. You can create a theme or color scheme for your tree, or go for a more eclectic look. The possibilities are endless!
Step 6: Hang the Tree
Find a spot on the wall where you’d like to hang the tree, making sure it’s level and secure. Use a level and measuring tape to ensure the tree is perfectly aligned with the wall. Use screws or nails to hang the tree, making sure it’s sturdy and won’t fall over time.
Tips and Variations:
- Use a frame: Instead of using a plain board, try using a frame to create a more polished look for your tree.
- Experiment with colors: Try experimenting with different colors for your tree, such as a bold red or a soft pink.
- Add dimension: Use different shapes and textures to add dimension to your tree, such as snowflakes, hearts, or stars.
- Create a theme: Create a theme for your tree, such as a coastal tree with seashells and driftwood, or a rustic tree with pinecones and twine.
Benefits of a DIY Wall Christmas Tree:
- Space-saving: A DIY wall Christmas tree is perfect for small spaces, such as apartments or urban homes, where a traditional tree wouldn’t fit.
- Customizable: With a DIY tree, you can create the shape, color, and design you want, making it a unique and personalized piece of art.
- Cost-effective: Using materials like plywood or MDF board, LED lights, and paint, you can create a beautiful tree without breaking the bank.
- Eco-friendly: A DIY tree is a great way to reduce waste and reuse materials, making it a sustainable choice for the holiday season.
Conclusion:
A DIY wall Christmas tree with lights is a fun and creative way to celebrate the holiday season. With this step-by-step guide, you can create a stunning and unique tree that adds a touch of magic to any room. Whether you’re a seasoned DIY enthusiast or a beginner, this project is perfect for anyone who wants to get creative and add some festive cheer to their home. Happy crafting and Happy Holidays!


Closure
Thus, we hope this article has provided valuable insights into A Magical DIY Wall Christmas Tree with Lights: A Step-by-Step Guide. We appreciate your attention to our article. See you in our next article!
Leave a Reply