Create a Magical Christmas Bulb Wreath DIY: A Step-by-Step Guide
Create a Magical Christmas Bulb Wreath DIY: A Step-by-Step Guide
Introduction
In this auspicious occasion, we are delighted to delve into the intriguing topic related to Create a Magical Christmas Bulb Wreath DIY: A Step-by-Step Guide. Let’s weave interesting information and offer fresh perspectives to the readers.
Table of Content
Create a Magical Christmas Bulb Wreath DIY: A Step-by-Step Guide

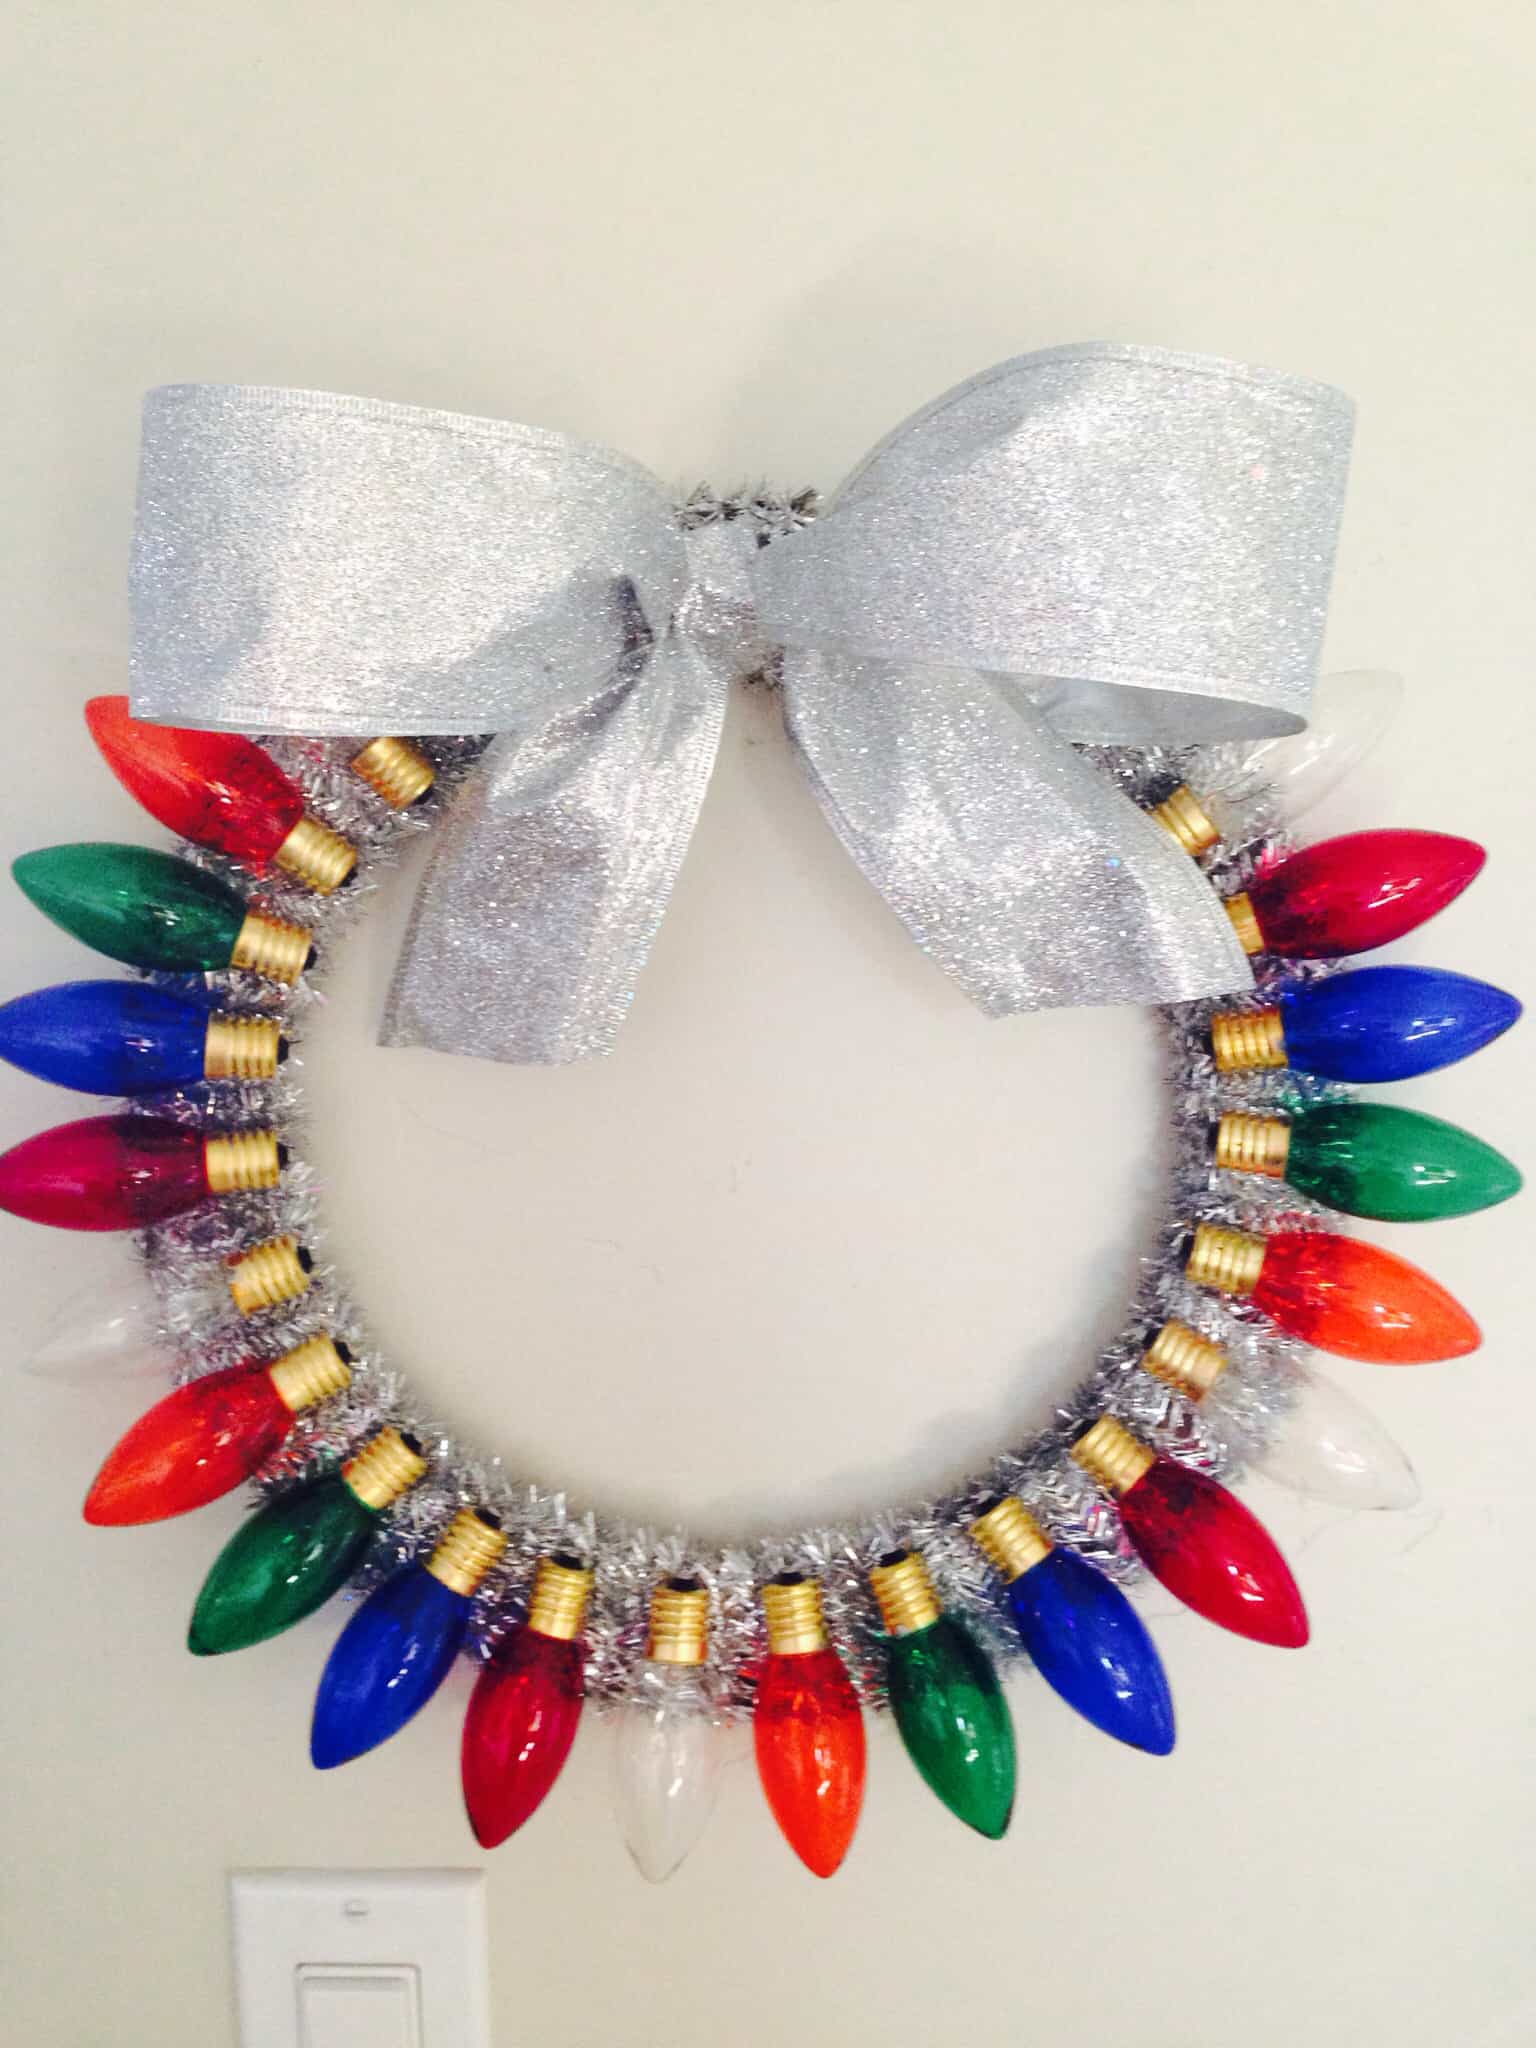
The spirit of Christmas is in the air, and with it, the excitement of decorating our homes for the holiday season. One of the most popular and festive ways to add a touch of Christmas cheer to our front doors, walls, or mantles is by creating a stunning Christmas bulb wreath. In this article, we will guide you through a step-by-step DIY tutorial to create a breathtaking Christmas bulb wreath that will make your home shine.
Materials Needed:
- Wire wreath frame (available at craft stores or online)
- Glass or plastic Christmas bulbs (various sizes and colors)
- Floral wire (green or brown)
- Hot glue gun (optional)
- Wire cutters
- Wire strippers (optional)
- Decorative items (optional)
- Artificial foliage (optional)
Step 1: Prepare Your Materials
Before starting your project, make sure you have all the necessary materials within arm’s reach. If using a wire wreath frame, remove any packaging or inserts. If using floral wire, cut a length of about 3-4 feet. If using hot glue gun, ensure you have a clean and stable workspace.
Step 2: Choose Your Color Scheme
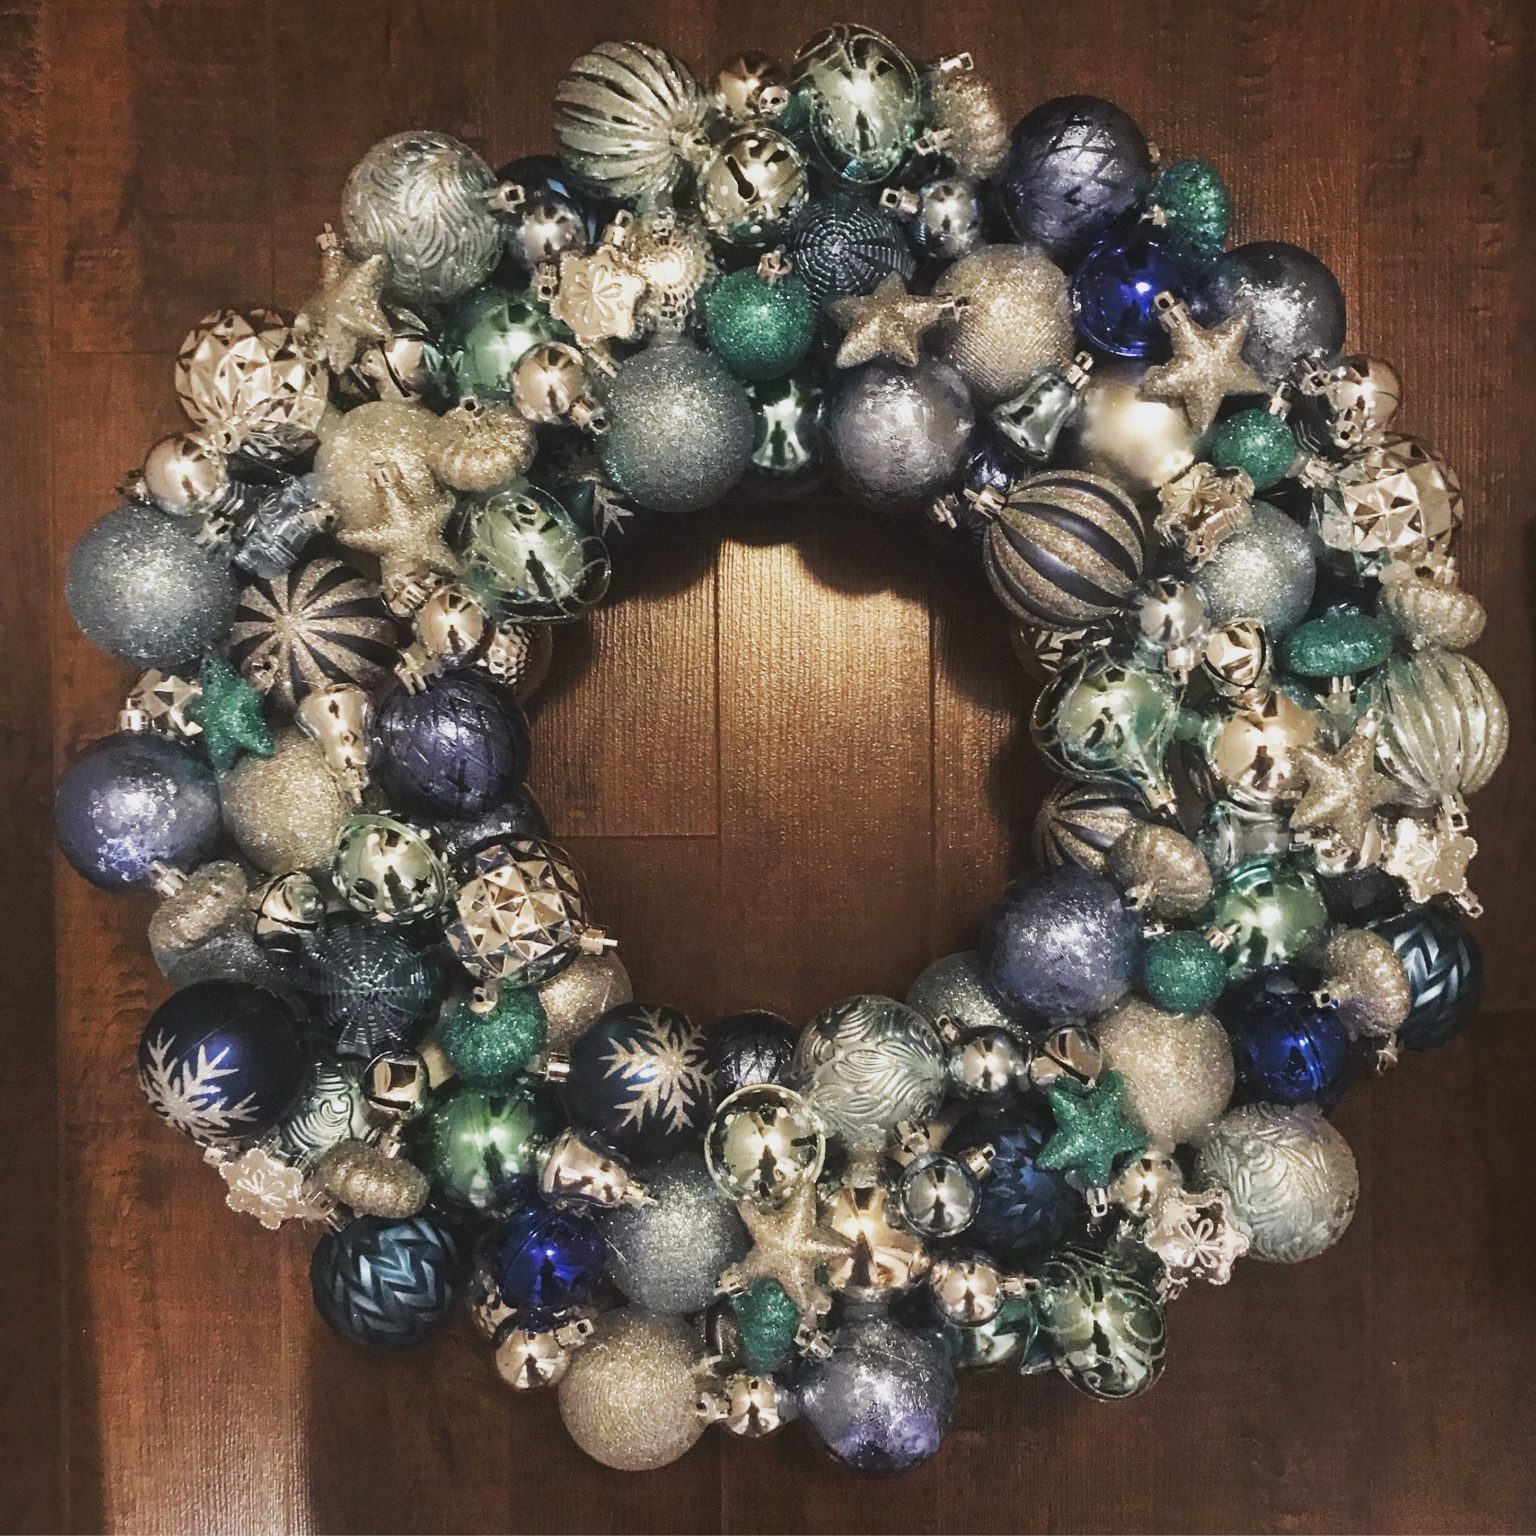
Select a color scheme that matches your home’s decor or personal style. Glass or plastic Christmas bulbs come in a wide range of colors, including clear, red, green, blue, and multi-colored. Mix and match bulbs to create a unique and whimsical look. If you want to add a pop of color, consider incorporating artificial foliage, such as eucalyptus or ferns, or decorative items, like pinecones or ribbons.
Step 3: Create Your Bulb Wreath Base
Begin by attaching your largest bulbs to the wire wreath frame using floral wire. Wrap the floral wire around the stem of the bulb and then around the frame, securing it in place. Make sure the bulbs are evenly spaced and the wire is not visible.
Step 4: Add the Top Layer of Bulbs
Using a combination of smaller and larger bulbs, create a top layer of bulbs around the wreath frame. Continue to wrap the floral wire around the stem of each bulb and then around the frame, securing it in place. Make sure the bulbs are snug against each other to create a full and lush look.
Step 5: Add a Middle Layer of Bulbs
Add a middle layer of bulbs, using a mix of smaller and larger bulbs. This layer will create a balanced and textured look. As you add the middle layer of bulbs, remember to space them out evenly and make sure they are snug against each other.
Step 6: Add a Bottom Layer of Bulbs
Using the smallest bulbs, create a bottom layer around the wreath frame. This layer will help fill in any gaps and create a full and lush look.
Step 7: Add Decorative Items (Optional)
If you want to add a personal touch to your wreath, now is the time to do it. Use hot glue gun to attach pinecones, ribbons, or other decorative items to the wreath frame or between the bulbs.
Step 8: Finish with a Ribbon or Bow
Finish your wreath by attaching a ribbon or bow to the top of the frame. This will add a pop of color and create a beautiful finishing touch.
Step 9: Hang and Enjoy
Hang your wreath on your front door, wall, or mantle and enjoy the magic of the season. Make sure to check the weight and size of your wreath to ensure it is securely fastened and will not fall off.
Tips and Variations:
- To add a vintage touch, use mercury glass bulbs or vintage glass ornaments.
- To add a modern twist, use clear glass or plastic bulbs and add a pops of color with ribbons or bows.
- To add a rustic touch, use natural elements, such as pinecones, branches, or moss.
- To create a monochromatic look, use bulbs of the same color and add a pop of contrast with decorative items.
- To create a whimsical look, add a mix of bulb sizes and shapes.
Troubleshooting Tips:
- If you’re having trouble securing the bulbs to the wreath frame, try using hot glue gun to attach them.
- If you’re having trouble getting the floral wire to stick to the bulbs, try cleaning the area with a damp cloth and then applying a small amount of floral wire glue.
Safety Precautions:
- When using wire cutters, ensure you wear protective gloves to prevent injury.
- When using hot glue gun, ensure you wear protective gloves and keep a safe distance from children and pets.
Conclusion:
Creating a Christmas bulb wreath DIY is a fun and easy project that can add a touch of magic to your home. With a few simple materials and some patience, you can create a stunning and memorable holiday decoration that will be cherished for years to come. Whether you’re a seasoned crafter or a beginner, this tutorial will guide you through a step-by-step process to create a breathtaking Christmas bulb wreath that will make your home shine. So, get creative, have fun, and make this holiday season one to remember!
Word Count: 1600
Note: This article is strictly for informative purposes, and individuals should follow all safety precautions and use caution when working with hot glue guns, wire cutters, and other materials.


Closure
Thus, we hope this article has provided valuable insights into Create a Magical Christmas Bulb Wreath DIY: A Step-by-Step Guide. We hope you find this article informative and beneficial. See you in our next article!
Leave a Reply