Get Festive with These DIY Christmas Nail Designs
Get Festive with These DIY Christmas Nail Designs
Introduction
In this auspicious occasion, we are delighted to delve into the intriguing topic related to Get Festive with These DIY Christmas Nail Designs. Let’s weave interesting information and offer fresh perspectives to the readers.
Table of Content
Get Festive with These DIY Christmas Nail Designs

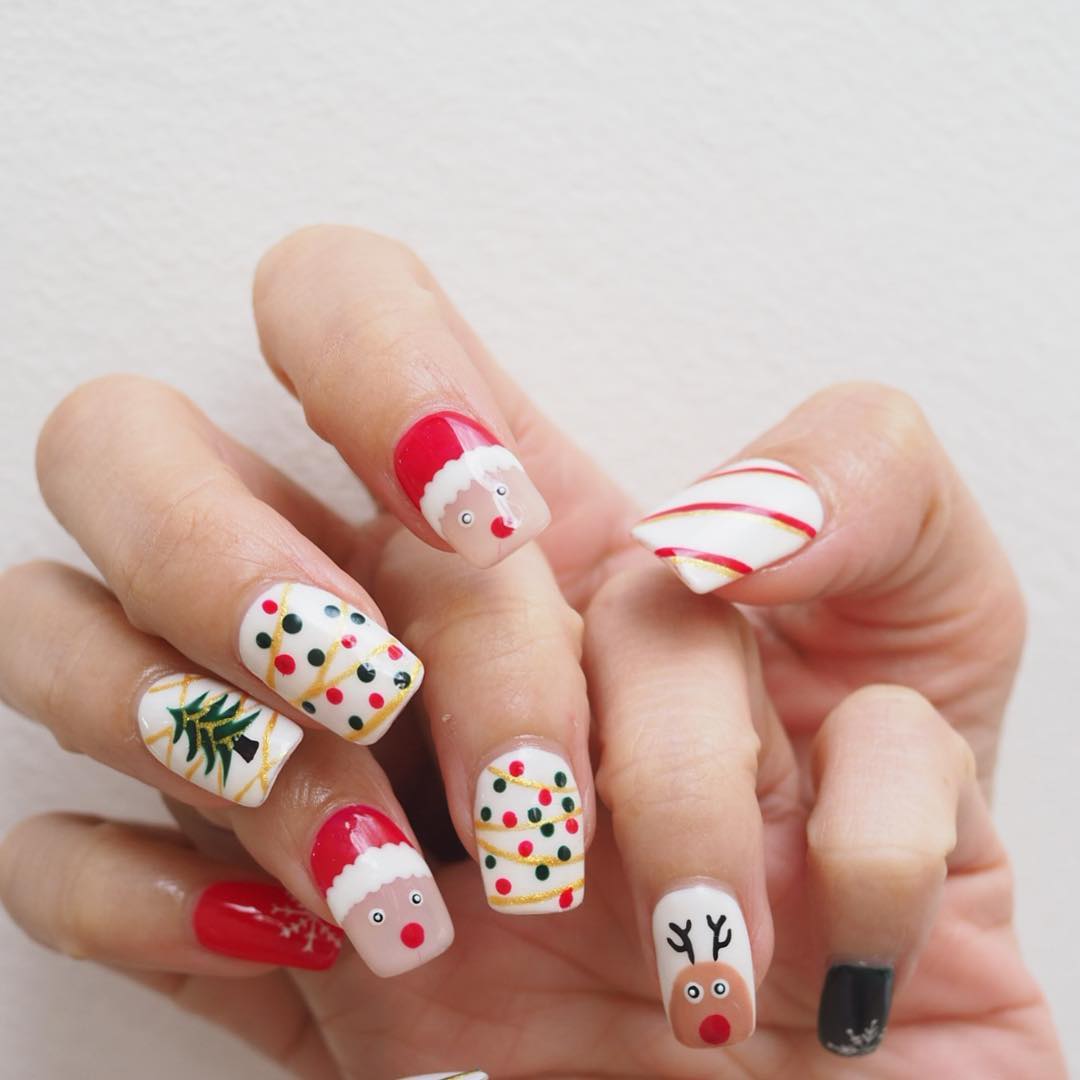
Christmas is just around the corner, and what better way to get into the holiday spirit than with some festive and fun Christmas nail designs? In this article, we’ll show you how to create 10 different DIY Christmas nail designs that are sure to make your holiday season merry and bright.
Materials Needed:
Before we dive into the designs, here are the materials you’ll need to get started:
- Nail polish remover
- Base coat
- Nail polish (various colors)
- Nail art brushes
- Nail stickers or stamps
- Glitter (optional)
- Rhinestones or other nail decorations (optional)
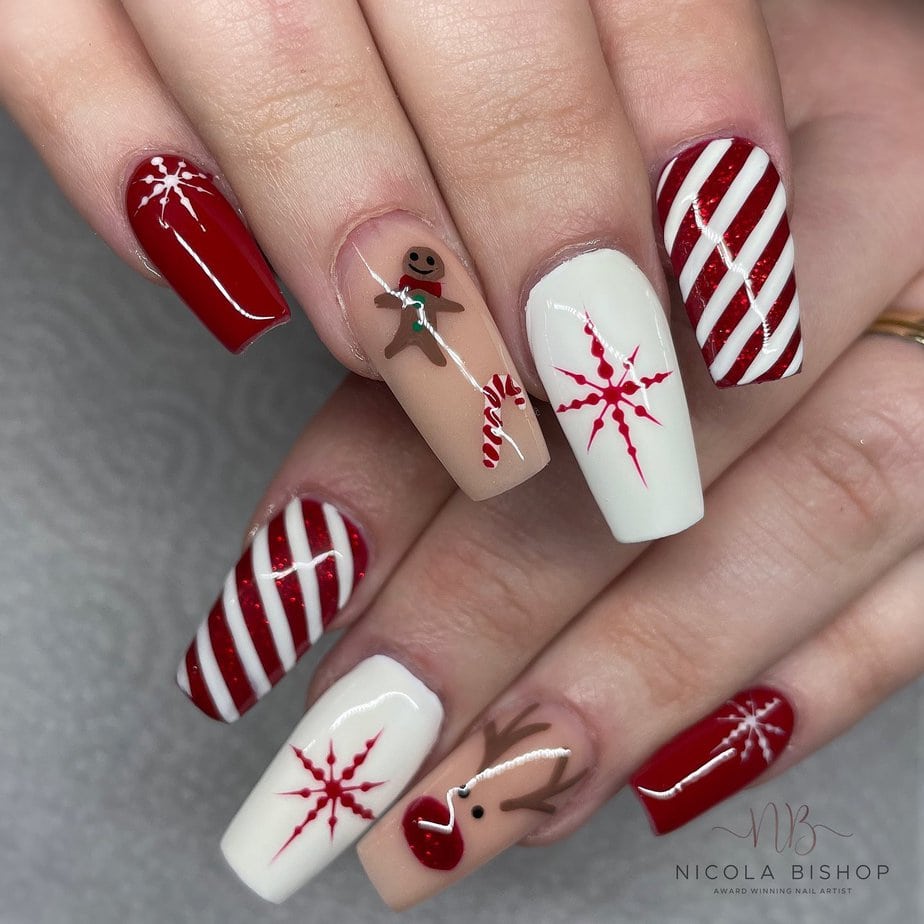
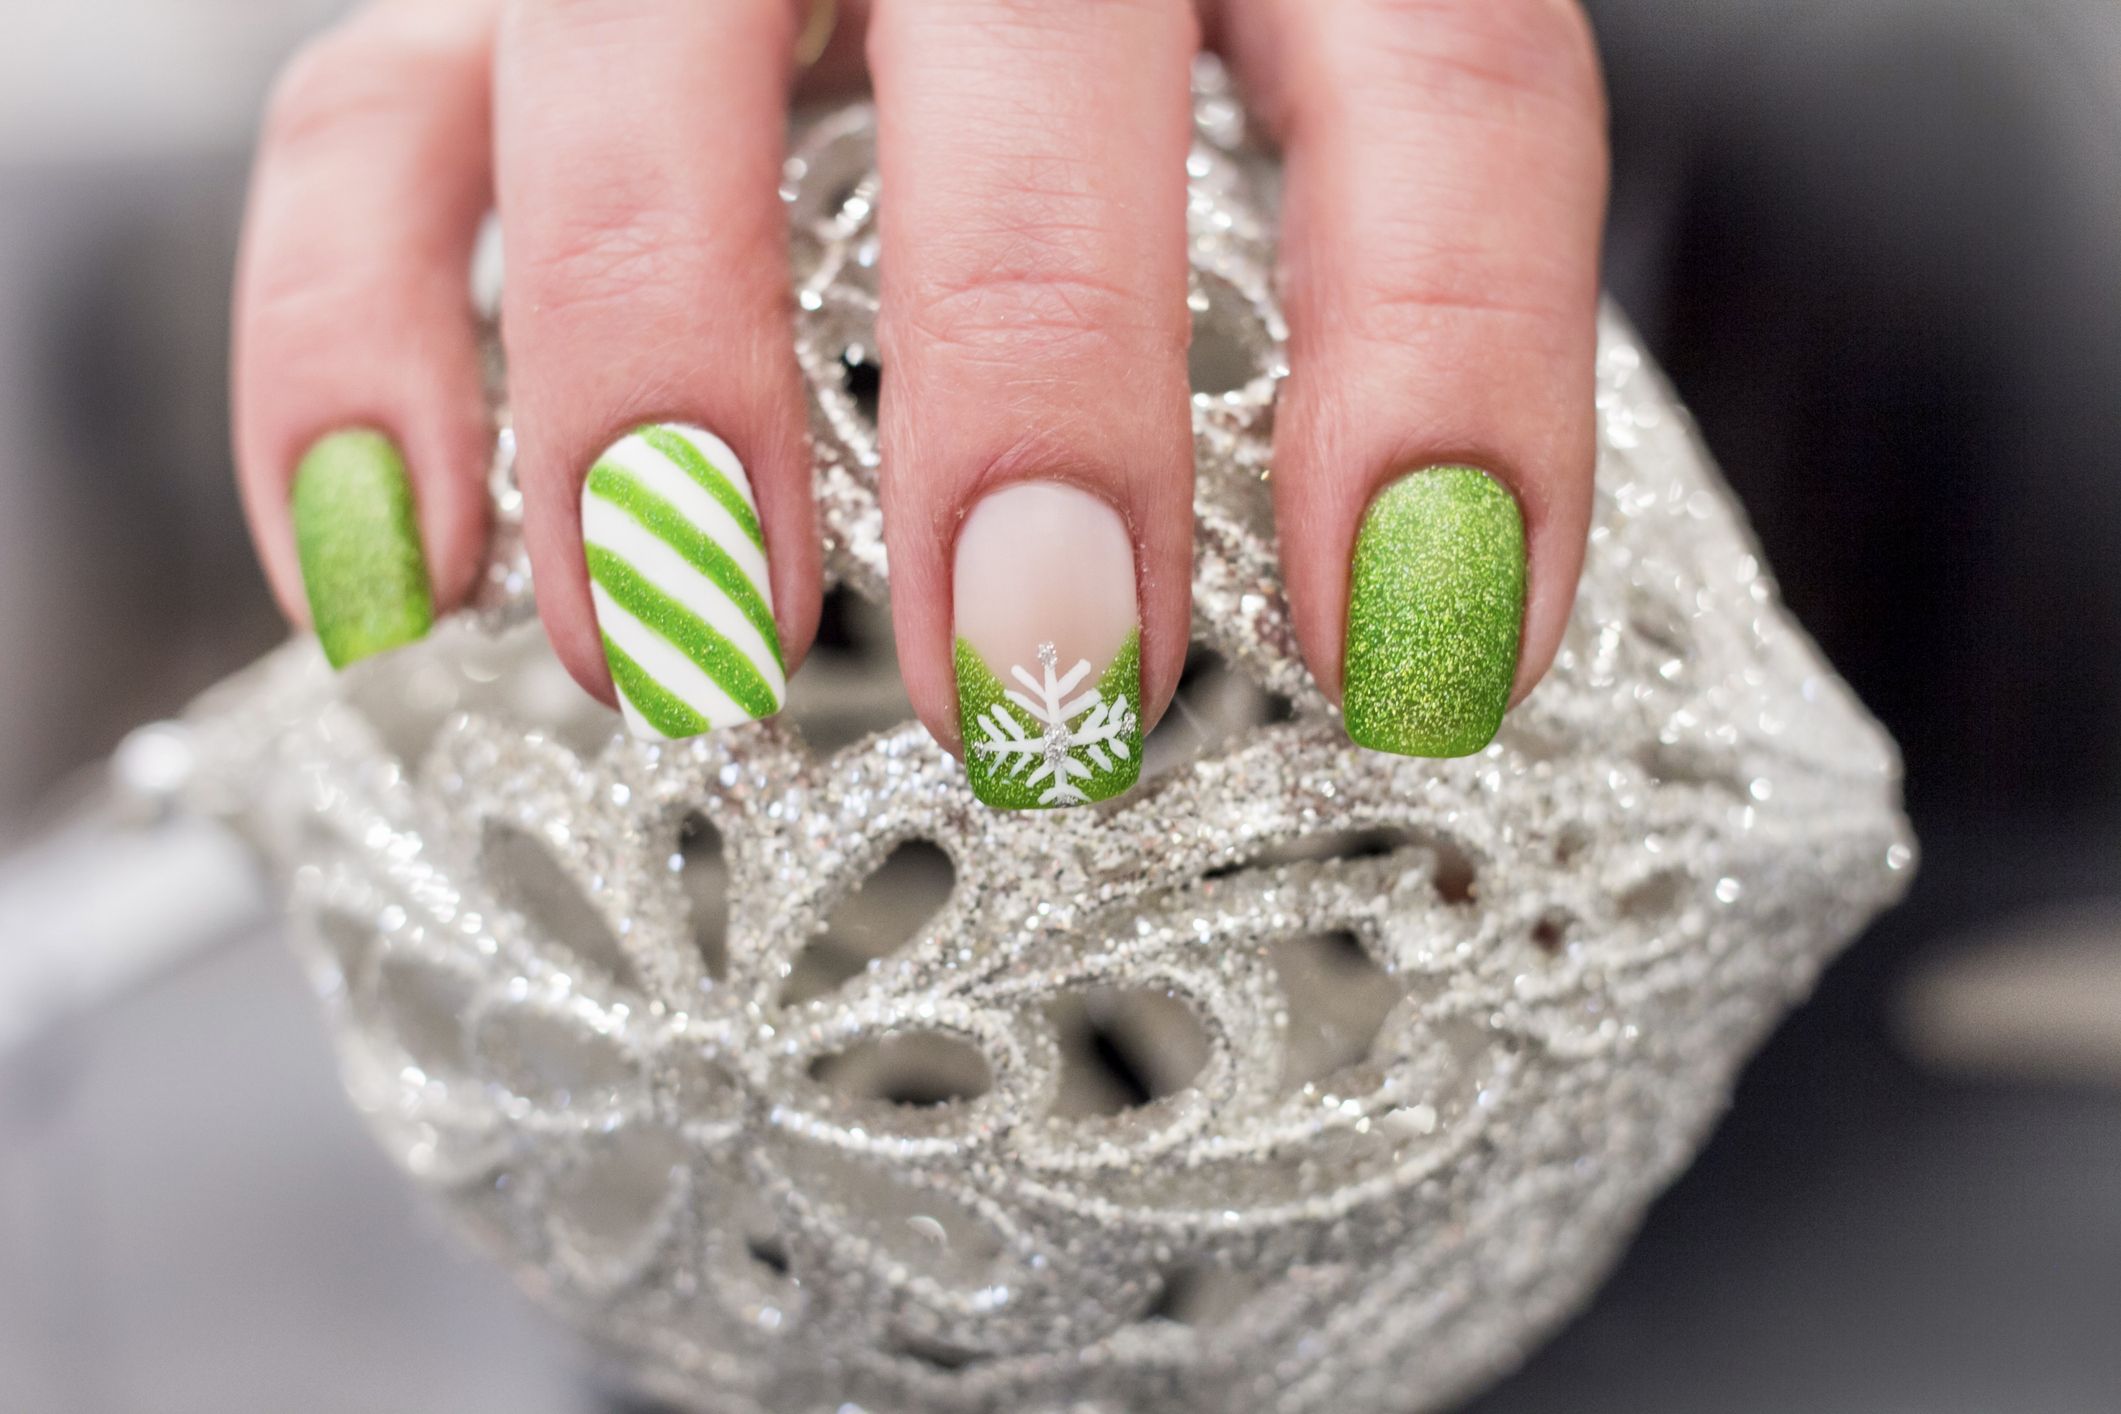
Design 1: Candy Cane Stripes
This classic Christmas design is easy to create and looks great on short or long nails.
- Start by painting a base coat on your nails.
- Using a nail art brush, paint a thin stripe of red polish on each nail, starting at the cuticle and working your way down to the tip of the nail.
- Using a nail art brush and white polish, paint a thin stripe next to the red stripe, starting at the cuticle and working your way down to the tip of the nail.
- Continue alternating red and white stripes until you reach the end of your nail.
- Finish with a top coat to seal in your design.
Design 2: Christmas Tree
This design is perfect for those with longer nails or for those who want to create a more intricate design.
- Start by painting a base coat on your nails.
- Using a nail art brush, paint a small triangle at the center of each nail, using green polish.
- Using a nail art brush and white polish, paint a small snowflake design on either side of the triangle.
- Using a nail art brush and red polish, paint a small dot at the top of each triangle to create the tree’s star.
- Using a nail art brush and brown polish, paint a small trunk at the base of each triangle.
- Finish with a top coat to seal in your design.
Design 3: Snowman
This adorable design is sure to bring a smile to your face.
- Start by painting a base coat on your nails.
- Using a nail art brush, paint a small circle at the center of each nail, using white polish.
- Using a nail art brush and black polish, paint two small dots for the eyes and a small curved line for the smile.
- Using a nail art brush and orange polish, paint a small carrot nose.
- Using a nail art brush and black polish, paint two small sticks on either side of the body for the arms.
- Using a nail art brush and black polish, paint a small top hat on top of the head.
- Finish with a top coat to seal in your design.
Design 4: Reindeer
This design is perfect for those who love animals and the outdoors.
- Start by painting a base coat on your nails.
- Using a nail art brush, paint a small oval shape at the center of each nail, using brown polish.
- Using a nail art brush and white polish, paint two small eyes and a small red nose.
- Using a nail art brush and black polish, paint a small curved line for the mouth and two small sticks on either side of the head for the antlers.
- Using a nail art brush and black polish, paint a small red dot on the end of each antler for the holly berries.
- Finish with a top coat to seal in your design.
Design 5: Gingerbread Man
This sweet design is sure to make your holiday season merry and bright.
- Start by painting a base coat on your nails.
- Using a nail art brush, paint a small body shape at the center of each nail, using brown polish.
- Using a nail art brush and white polish, paint two small eyes and a small red mouth.
- Using a nail art brush and black polish, paint a small curved line for the smile and two small sticks on either side of the body for the arms.
- Using a nail art brush and black polish, paint a small hat on top of the head.
- Using a nail art brush and red polish, paint a small bow tie around the neck.
- Finish with a top coat to seal in your design.
Design 6: Holly Leaves
This design is perfect for those who love the festive colors of Christmas.
- Start by painting a base coat on your nails.
- Using a nail art brush, paint a small oval shape at the center of each nail, using green polish.
- Using a nail art brush and red polish, paint a small dot in the center of each oval shape for the berry.
- Using a nail art brush and green polish, paint a small curved line on either side of the oval shape for the leaves.
- Finish with a top coat to seal in your design.
Design 7: Snowflake
This delicate design is sure to add a touch of magic to your holiday season.
- Start by painting a base coat on your nails.
- Using a nail art brush, paint a small snowflake design on each nail, using white polish.
- Using a nail art brush and blue polish, paint a small dot in the center of each snowflake for the center.
- Using a nail art brush and blue polish, paint a small curved line on either side of the snowflake for the wings.
- Finish with a top coat to seal in your design.
Design 8: Santa Hat
This fun design is perfect for those who love the jolly old man himself.
- Start by painting a base coat on your nails.
- Using a nail art brush, paint a small rectangle shape at the center of each nail, using red polish.
- Using a nail art brush and white polish, paint a small curved line at the top of each rectangle for the cuff.
- Using a nail art brush and white polish, paint a small white pom-pom at the top of each cuff.
- Finish with a top coat to seal in your design.
Design 9: Christmas Lights
This bright and colorful design is sure to light up your holiday season.
- Start by painting a base coat on your nails.
- Using a nail art brush, paint a small curved line on each nail, using green polish.
- Using a nail art brush and red polish, paint a small dot on either side of the curved line for the lights.
- Using a nail art brush and blue polish, paint a small curved line on either side of the lights for the cord.
- Finish with a top coat to seal in your design.
Design 10: Present
This adorable design is perfect for those who love to give gifts.
- Start by painting a base coat on your nails.
- Using a nail art brush, paint a small rectangle shape at the center of each nail, using green polish.
- Using a nail art brush and red polish, paint a small bow on top of each rectangle.
- Using a nail art brush and red polish, paint a small curved line on either side of the bow for the ribbons.
- Finish with a top coat to seal in your design.
Tips and Tricks:
Here are a few tips and tricks to help you create the perfect DIY Christmas nail designs:
- Use a base coat to protect your nails and prevent staining.
- Use a nail art brush to create intricate designs and details.
- Use nail stickers or stamps to create complex designs.
- Use glitter or rhinestones to add extra sparkle to your design.
- Practice, practice, practice! The more you practice, the better your designs will become.
Conclusion:
With these 10 DIY Christmas nail designs, you’ll be sure to make your holiday season merry and bright. Whether you’re a beginner or a pro, these designs are easy to create and look great on short or long nails. So why not get creative and try out a few of these designs today? Happy holidays!
Common Questions:
Q: How do I remove old nail polish without damaging my nails?
A: To remove old nail polish, use a nail polish remover and gently scrub the polish off with a cotton swab. Be sure to moisturize your nails after removal to prevent dryness.
Q: How do I prevent nail polish from staining my nails?
A: To prevent nail polish from staining your nails, use a base coat before applying polish. This will protect your nails and prevent staining.
Q: Can I use nail stickers or stamps to create designs?
A: Yes, nail stickers and stamps are a great way to create complex designs without having to freehand them.
Q: How do I add extra sparkle to my design?
A: Use glitter or rhinestones to add extra sparkle to your design. You can apply them using a nail art brush or by using a nail glue.
Q: What is the best way to dry nail polish quickly?
A: Use a hair dryer on a low setting or apply a top coat to dry your nail polish quickly.


Closure
Thus, we hope this article has provided valuable insights into Get Festive with These DIY Christmas Nail Designs. We thank you for taking the time to read this article. See you in our next article!
Leave a Reply