Title: Enchanting Dried Flower Christmas Ornaments: A Step-by-Step Guide to Create Your Own
Title: Enchanting Dried Flower Christmas Ornaments: A Step-by-Step Guide to Create Your Own
Introduction
In this auspicious occasion, we are delighted to delve into the intriguing topic related to Title: Enchanting Dried Flower Christmas Ornaments: A Step-by-Step Guide to Create Your Own. Let’s weave interesting information and offer fresh perspectives to the readers.
Table of Content
Title: Enchanting Dried Flower Christmas Ornaments: A Step-by-Step Guide to Create Your Own
As the holiday season approaches, many of us start thinking about decorating our homes with festive and elegant decorations. One of the most beautiful and unique ways to add a personal touch to your Christmas tree or home decor is by creating your own dried flower Christmas ornaments. In this article, we will explore the world of dried flower crafting and provide a step-by-step guide on how to create your own stunning dried flower Christmas ornaments.
The Magic of Dried Flowers
Dried flowers have been used for centuries in various applications, including floral arrangements, potpourri, and crafts. The process of drying flowers involves removing the moisture from the petals, stems, and leaves, which helps to preserve their natural beauty and structure. Dried flowers can be used in a variety of ways, including wreath-making, garland creation, and, of course, Christmas ornament crafting.
Choosing the Right Dried Flowers
When it comes to creating dried flower Christmas ornaments, it’s essential to choose flowers that are suitable for drying and that will retain their color and texture. Some popular flowers for drying include:
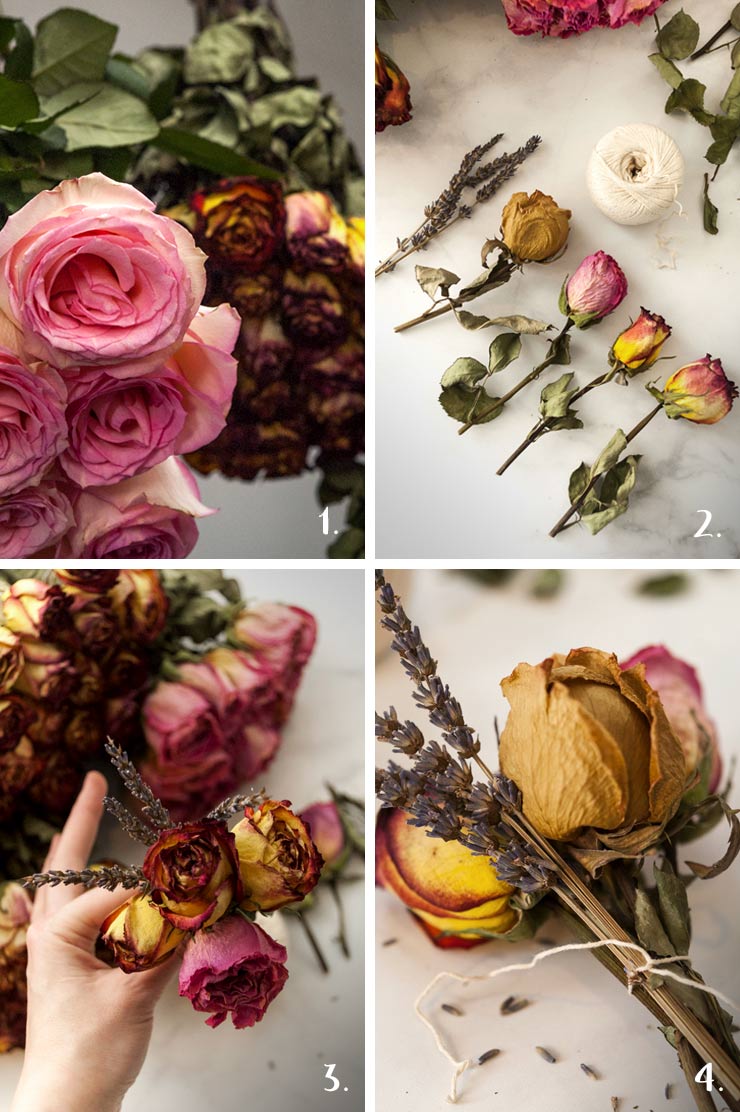
- Roses: A classic choice for dried flower arrangements, roses come in a variety of colors and are perfect for adding a romantic touch to your Christmas ornaments.
- Carnations: Known for their long-lasting blooms, carnations are an excellent choice for drying and can add a pop of color to your ornaments.
- Baby’s breath: This delicate flower is perfect for adding a whimsical touch to your ornaments and can be used to create beautiful, airy arrangements.
- Lavender: The fragrant purple blooms of lavender are not only stunning but also retain their scent when dried, making them a wonderful choice for Christmas ornaments.
- Marigolds: With their bright yellow and orange hues, marigolds are perfect for adding a sunny touch to your Christmas ornaments.
Gathering Materials
Before you start creating your dried flower Christmas ornaments, make sure you have the following materials:
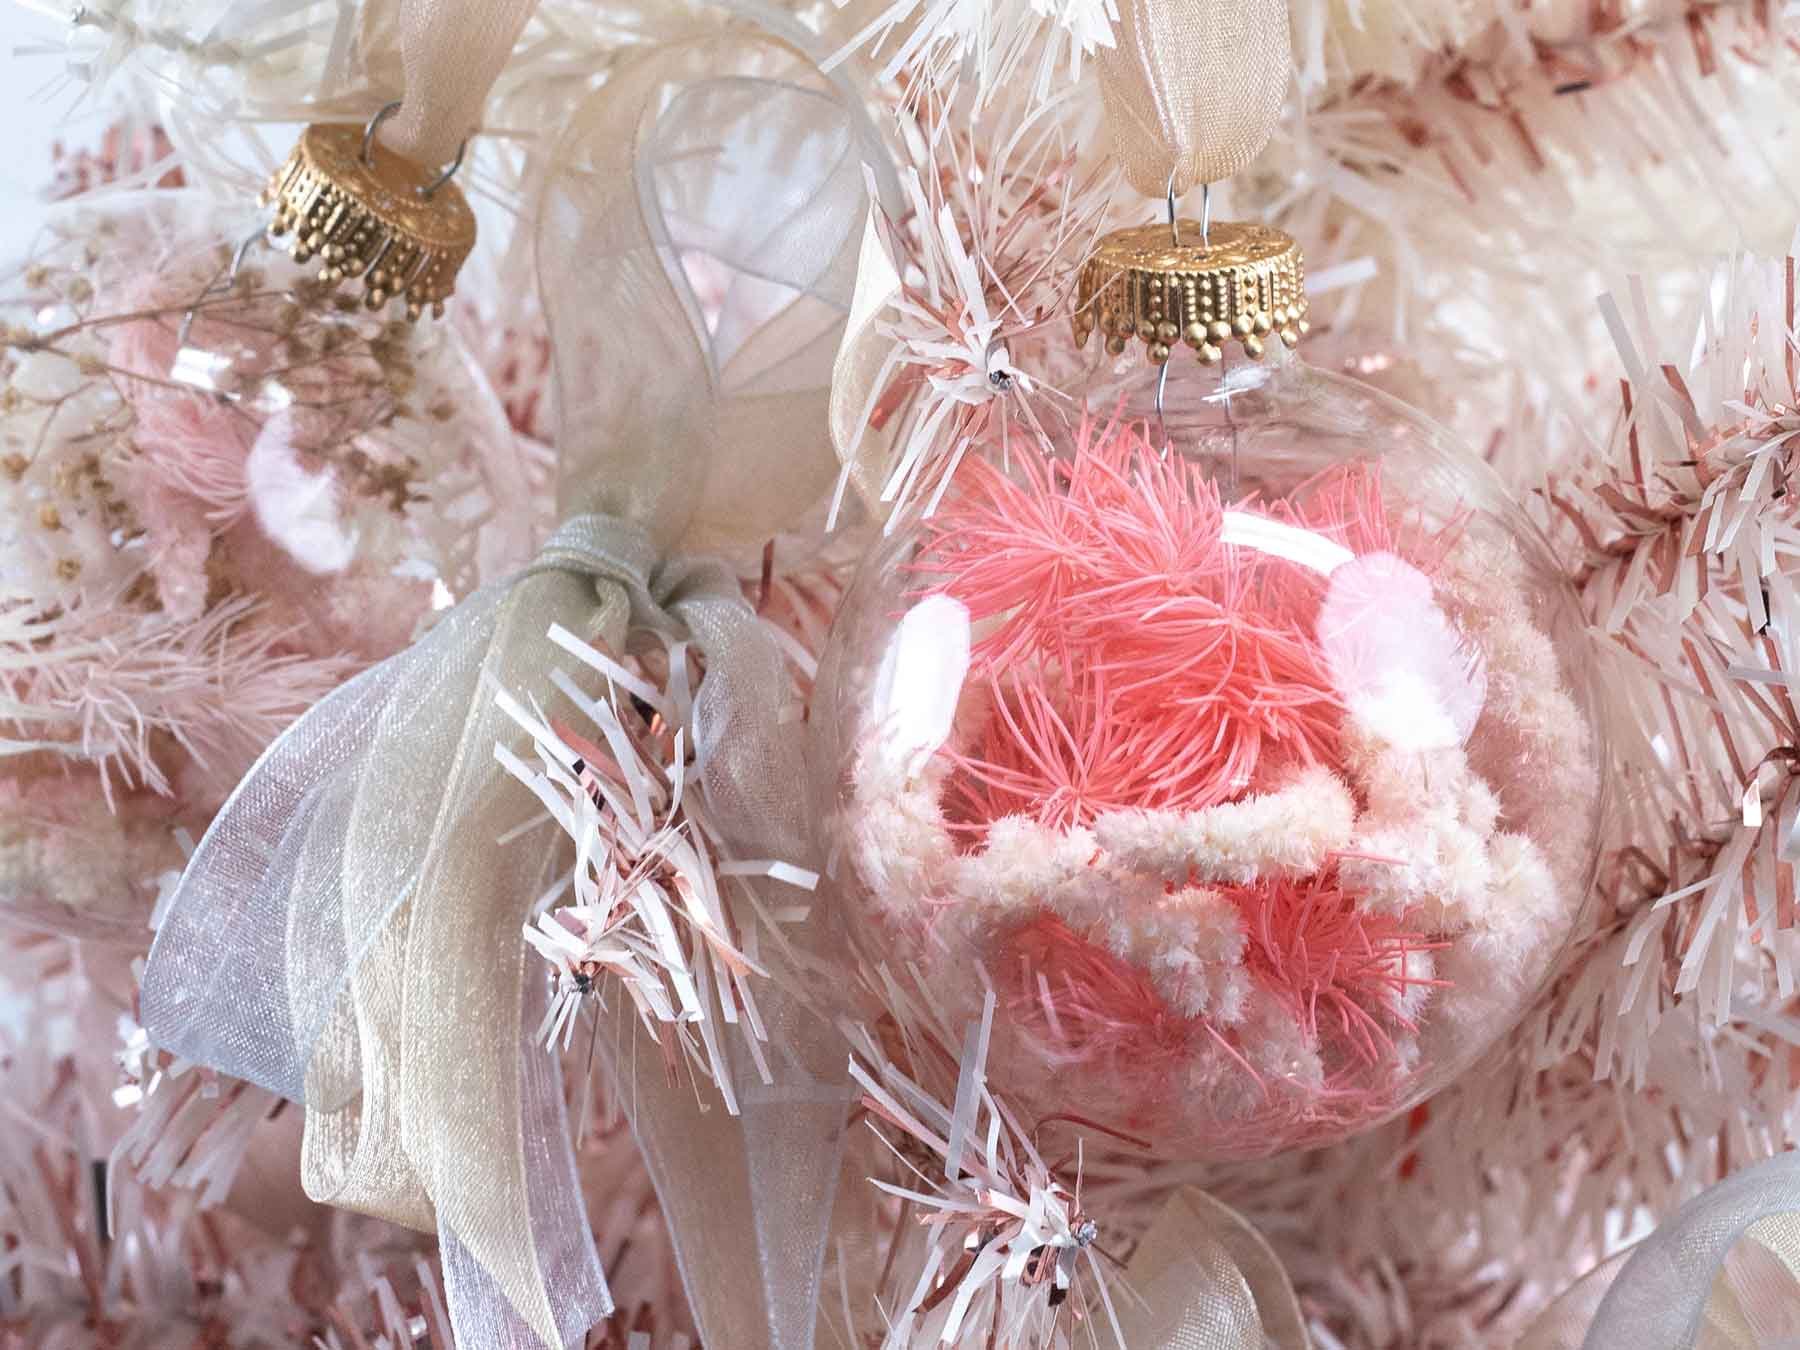
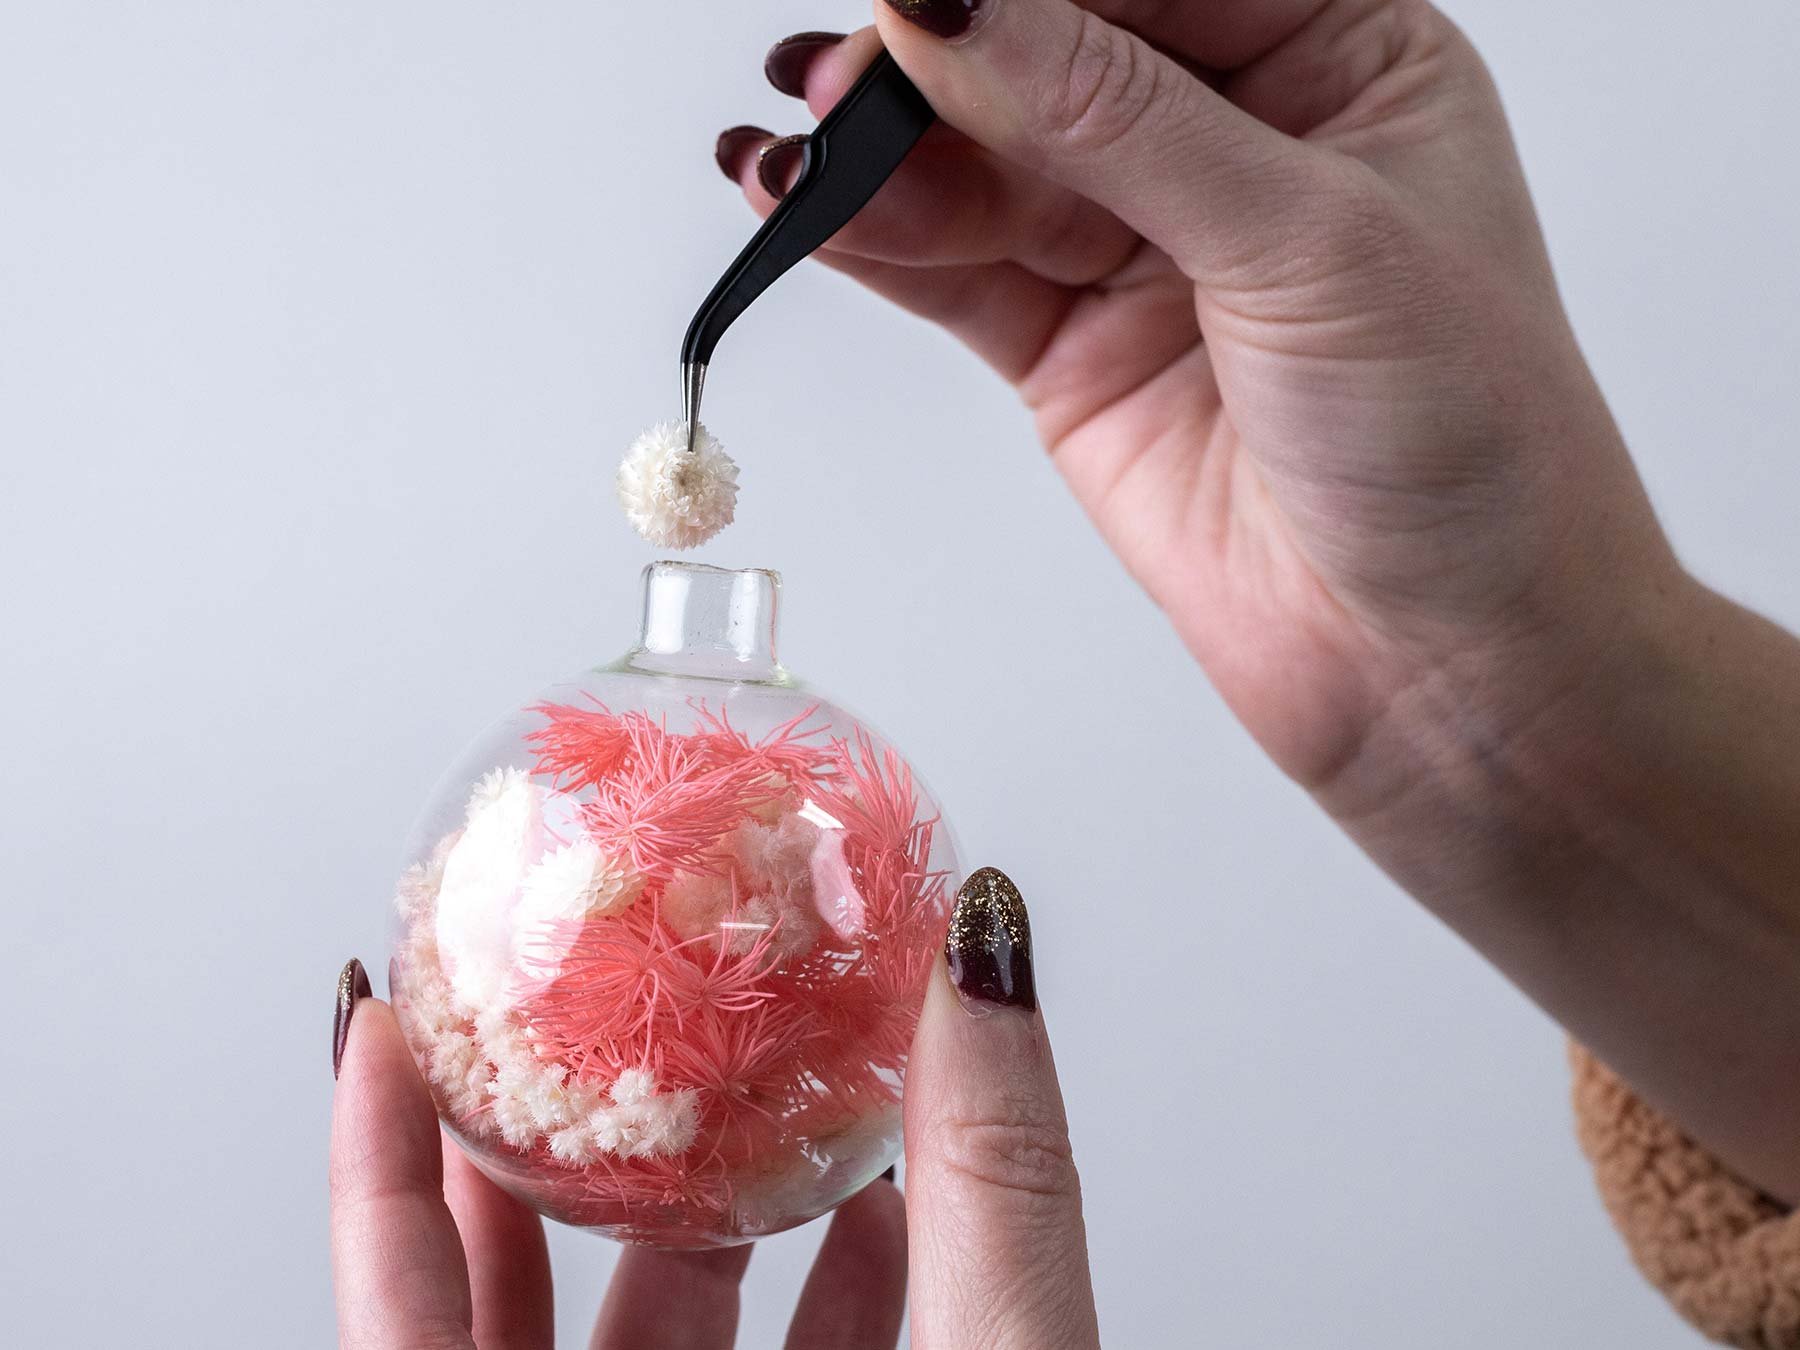
- Dried flowers: Choose your favorite flowers and dry them using a desiccant or by air-drying them.
- Wire: Thin wire is necessary for creating the framework of your ornaments.
- Floral tape: This is a special type of tape used to attach flowers to wire frames.
- Ornament bases: You can use wooden or plastic bases to create the foundation of your ornaments.
- Ribbon or twine: For hanging your ornaments.
- Hot glue gun: For attaching flowers and decorations to your ornaments.
- Scissors: For cutting wire and floral tape.
Step-by-Step Guide to Creating Dried Flower Christmas Ornaments
Step 1: Prepare Your Flowers
Before you start creating your ornaments, make sure your dried flowers are ready to use. If you haven’t already, dry your flowers using a desiccant or by air-drying them. Remove any excess leaves or stems, and gently bend the petals to create a more natural shape.
Step 2: Create the Framework
Using your wire, create the framework of your ornament. This can be a simple circular shape or a more intricate design, depending on your preference. Use floral tape to attach the wire to the ornament base.
Step 3: Attach the Flowers
Begin attaching the dried flowers to the wire framework using floral tape. Start with the largest flowers and work your way down to the smallest. Make sure to leave enough space between each flower to create a natural, layered look.
Step 4: Add Filler Flowers
Once you’ve attached the main flowers, add filler flowers such as baby’s breath to create a more lush arrangement.
Step 5: Secure the Flowers
Using hot glue, secure the flowers to the wire framework. Make sure the glue is fully dry before handling the ornament.
Step 6: Add a Hanger
Attach a ribbon or twine to the top of the ornament to create a hanger.
Step 7: Finishing Touches
Add any final decorations, such as glitter or small ornaments, to your dried flower Christmas ornament.
Tips and Variations
- Experiment with different shapes: Try using different shapes, such as stars or hearts, to create unique ornaments.
- Mix and match flowers: Combine different flowers and foliage to create a one-of-a-kind ornament.
- Add scents: Use essential oils or fragrances to give your ornaments a festive scent.
- Create a theme: Design ornaments around a specific theme, such as a winter wonderland or a festive forest.
Preserving Your Dried Flower Christmas Ornaments
Dried flower Christmas ornaments can be delicate and may not withstand extreme temperatures or moisture. To preserve your ornaments, follow these tips:
- Keep them away from direct sunlight: Direct sunlight can cause the flowers to fade or become brittle.
- Avoid exposing them to moisture: Moisture can cause the flowers to become discolored or weakened.
- Store them in a cool, dry place: Store your ornaments in a cool, dry place, away from extreme temperatures.
- Use a clear coat: Consider applying a clear coat to your ornaments to protect them from dust and moisture.
Conclusion
Creating your own dried flower Christmas ornaments is a fun and rewarding project that can add a personal touch to your holiday decorations. With a few simple materials and some basic crafting skills, you can create stunning ornaments that will last for years to come. Whether you’re a seasoned crafter or a beginner, we hope this guide has inspired you to try your hand at creating your own dried flower Christmas ornaments.


Closure
Thus, we hope this article has provided valuable insights into Title: Enchanting Dried Flower Christmas Ornaments: A Step-by-Step Guide to Create Your Own. We thank you for taking the time to read this article. See you in our next article!
Leave a Reply